
Yoga4Peace
Peace is the nature and quality of people’s relationships. ―John Paul Lederach
👥 Serves: 1 person, 11-25 people, 2-10 people
🎚 Difficulty: Easy
⏳ Total time: 11-30 minutes
🥣 Ingredients: A quiet place with no distractions, yoga mat (1 per participant), blanket (1 per participant), comfortable clothes
🤓 Wholebeing Domains: Awareness, Meaning, Positive Emotion, Ritualising
💪 Wholebeing Skills: Centring, Exercising, Flow, Mind-body-connection, Mindfulness, Movement, Optimism, Peacefulness

Yoga4Peace
📝 Description
A heart-opening practice for a deeper connection with oneself, others, and the environment.
Peace is an art that we can learn and practice. Our relationship with ourselves influences the way we relate to others. The practice of yoga asanas and meditation are beautiful tools that help us connect with ourselves and find inner peace. The physical positions have a direct influence on our mental and spiritual wellbeing. Yoga backbends open up the front body, which is known to have a stimulating effect on our heart area – a real mood booster.
This recipe has been kindly donated by Lina Westermann, founder of DEEP Deutschland.
•••
Important: We shared this recipe as part of our blog post “Wellbeing for Ukraine” and you can access a translated version here (kindly translated by our changemaker friend Lisa Glybchenko).
👣 Steps
Step 1 – Open heart meditation (5’)
Find a comfortable seated position. Find grounding while at the same time lengthening your spine. Give yourself time to arrive here and now.
Breathe in through your nose, out through your mouth. Let go of everything that is still keeping you from being present. Let go of the things that you don’t need right now.
Put one hand on your heart and the other one on your belly. As you breathe quietly, notice how comforting it feels. Be aware that you can do this anytime and anywhere. With simple gestures and your own breath you can make yourself feel better. Notice how it calms you down. How it gives you a feeling of safety. Allow your full attention to come into this day, this hour, this time. Turn your full attention to this wonderful moment. Let your heart open and make room for all the good of the Universe to come in. Let’s affirm: I am divinely guided at all times.
Step 2 – Warm-up (5’)
Bend your arms and bring your hands to your shoulders. Start moving your shoulders in circles.
Now interlace your fingers behind your head – breathe in and open your chest and widen your elbows, breathe out and bring your chin to your chest and allow your elbows to come together. Repeat a few times.
With your next inhale bring your arms to the ceiling, with your exhale twist to your left side by putting your right hand on your left knee and your left hand behind you. Inhale again – bring your arms to the ceiling, exhale – twist to your right side by putting your left hand on your right knee and your right hand behind you. Repeat 3 times.
Step 3 – Anahatasana (1’)
Come to a table-top position – your hands are underneath your shoulders and your hips at the same level as your knees. Walk your hands forward, allowing your chest to drop to the floor. Keep your hips right above your knees. If possible, keep your hands shoulder width apart. Hold for approximately 3 minutes.
Step 4 – Child pose (1’)
Come back to a neutral pose, bring the big toes to touch, sit on the heels and come down into child pose. Breathe into the back of your body. Rest in this pose for a few more seconds. Then spread your fingers like a star-fish so that the index finger is facing forward.
Step 5 – Downward-facing dog (1’)
Return to all fours, tuck the toes under and come into your first downward-facing dog. Curl your toes under and push back through your hands to lift your hips and straighten your legs. Give yourself time to arrive here. Your shoulders and your neck are relaxed.
Step 6 – Uttanasana (1’)
Start walking your feet towards your hands until you come with your feet underneath your hips, bend your knees, and come into a forward fold. You can grab your elbows to release the spine.
Step 7 – Tadasana variation – mountain pose (1’)
Roll up your upper body and come to a standing position. Now interlace your fingers behind your back and bring your shoulder blades together. Inhale and exhale deeply a few times.
Step 8 – Plank pose (1’)
With your next inhale lift your arms up, then on the exhalation, come into a forward bend. Bend your knees, bring your hands to the yoga mat and then walk with one foot back, then the other.
Come to plank pose with the shoulders over the wrists. Stay there for five breaths. Make sure to maintain good alignment throughout by not letting your hips stick up or sag down. Instead, keep a nice, straight line from the crown of your head to your heels.
Step 9 – Sphinx pose (1’)
Come down to your belly. Your legs are straight and now bring your forearms to the floor. Be sure to press firmly into your forearms, which will help keep your shoulders away from your ears.
Step 10 – Happy baby pose (1’)
Roll over onto your back to prepare for happy baby pose. Hug your knees into your chest and then grab the outside of your feet to draw your knees into your chest and then grab the outsides of your feet to draw your knees toward your armpits and the shins perpendicular to the floor. You can rock side to side a little bit if that feels comfortable.
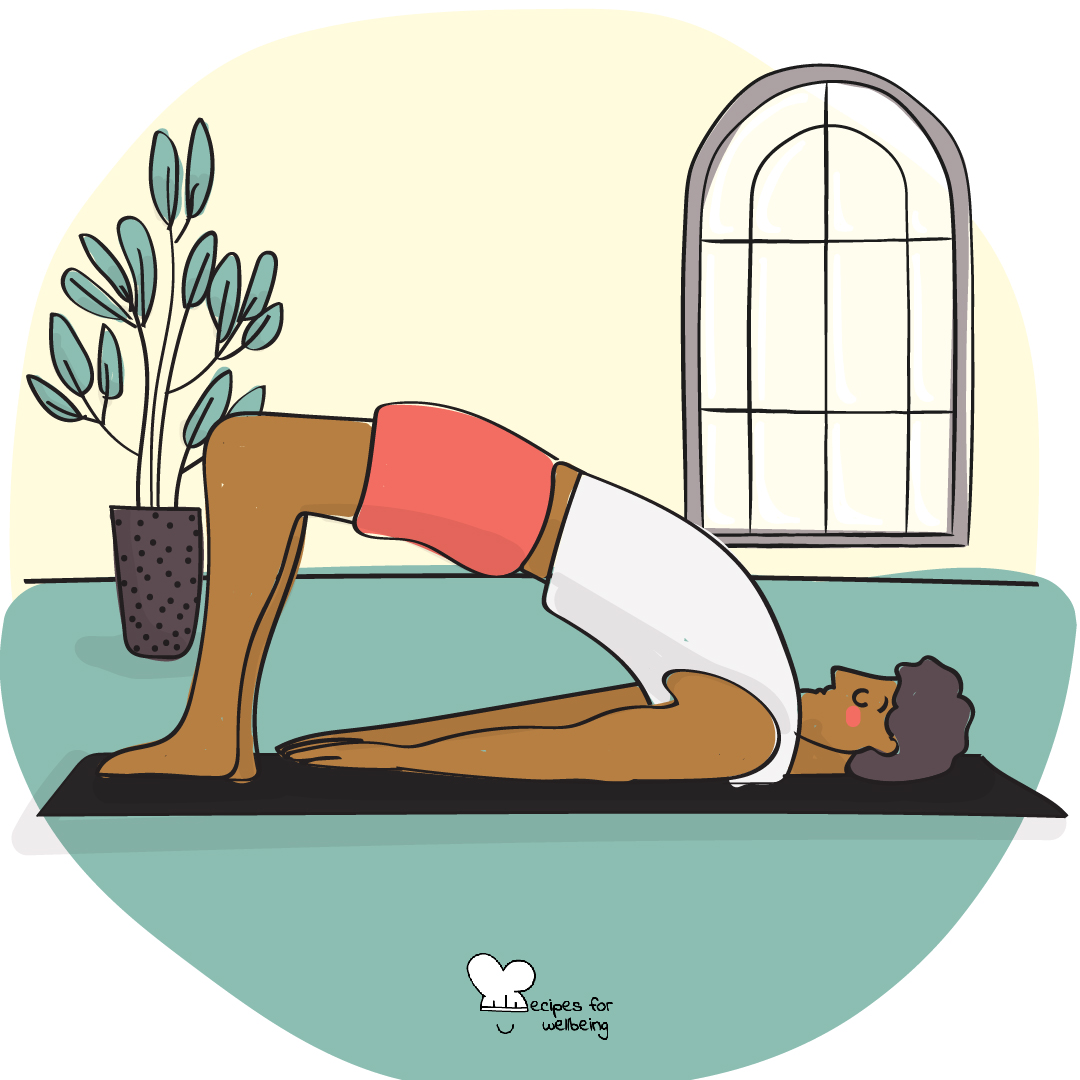
Step 11 – Bridge pose (1’)
Bring your feet back to the yoga mat and prepare for the bridge pose. Activate your legs, your glutes, bring strength into your feet and lift your hips up high. Now bring your shoulder blades together and if you want you can interlace your fingers underneath your back. Hold for five breaths.
Step 12 – Apanasana (1’)
Slowly come back to your back, bring your knees towards your upper body, gran your shin bones and give yourself a little massage.
Step 13 – Supta Baddha Konasana (3’)
Bring your feet back to the yoga mat with the soles touching and let your knees open to either side. Props (blocks or blankets) can be used here under the knees for support if you like. If you find this pose to be very comfortable, you can end your practice here. Otherwise, you can stay here for 1 to 5 minutes before transitioning to savasana.
Step 14 – Savasana (5’)
Straighten your legs to come into corpse pose (savasana) for the final relaxation… You may want to set an alarm for five minutes so you don’t fall asleep. Letting go of any breath patterns you had before, letting go of the practice… Just noticing how the body feels, the points of contact between the body and the ground… Grounding a bit more with each exhalation… After a few minutes, start to deepen the breath… start to move your fingers and toes… do a full-body stretch if that feels good. Roll to the right side, using your right arm as a pillow, enjoying a few more moments of not doing and just being… When you are ready, use the left arm to push you into a seated posture and you can stay here for a few more breaths before going back to your day.